Thursday, December 16, 2010

A Difficult Affair II

Wednesday night is gaming night and once again Godders and myself faced off with Blitzkrieg Commander. This time we used a real historical battle scenario titled "A Difficult Affair II" written by Steve Curtis. A Difficult Affair II is part of a series of scenarios centred around the Battle of Kursk in 1943. This scenario is played out in a small area of 16" x 24". All infantry.

The situation : At 1500hrs, on the 4th of July 1943 various German units of the 4th Panzer Army are sent forward into Soviet positions on reconnaissance in force missions. The objectives of these missions were to discover traps and gain lodgement in the Soviet lines.

Godders in Command of the 15th Company, 3rd Battalion, Panzer Fusilier Regiment, Grossdeutschland is tasked to capture the western edge of a low treeless ridge west of the village of Butovo. High command believes the ridge consists of dummy positions.

Godders sets up in his starting positions. He is in command of 9 Infantry Sections, 2 HMG Sections, a FAO and off board 81mm Mortars.

I am in command of a Soviet Reinforced Platoon, 3rd Battalion, 199th Guards Rifle Regiment. My mission is simple, hold the postion at all costs. Not one step back. I have 4 Infantry Sections, 1 MMG, 1 on-board 50mm mortar, a FAO and off-board 82mm Mortars. I have one wooden bunker and my troops can start the game dug in. I have access to barbed wire. The string line in the centre of the photo represents the crest of the ridge. I placed my MMG in the bunker. I put two infantry Sections in the crops on the left flank. And two infantry Sections dug in on the crest of the slope on the right flank. All troops are concealed.
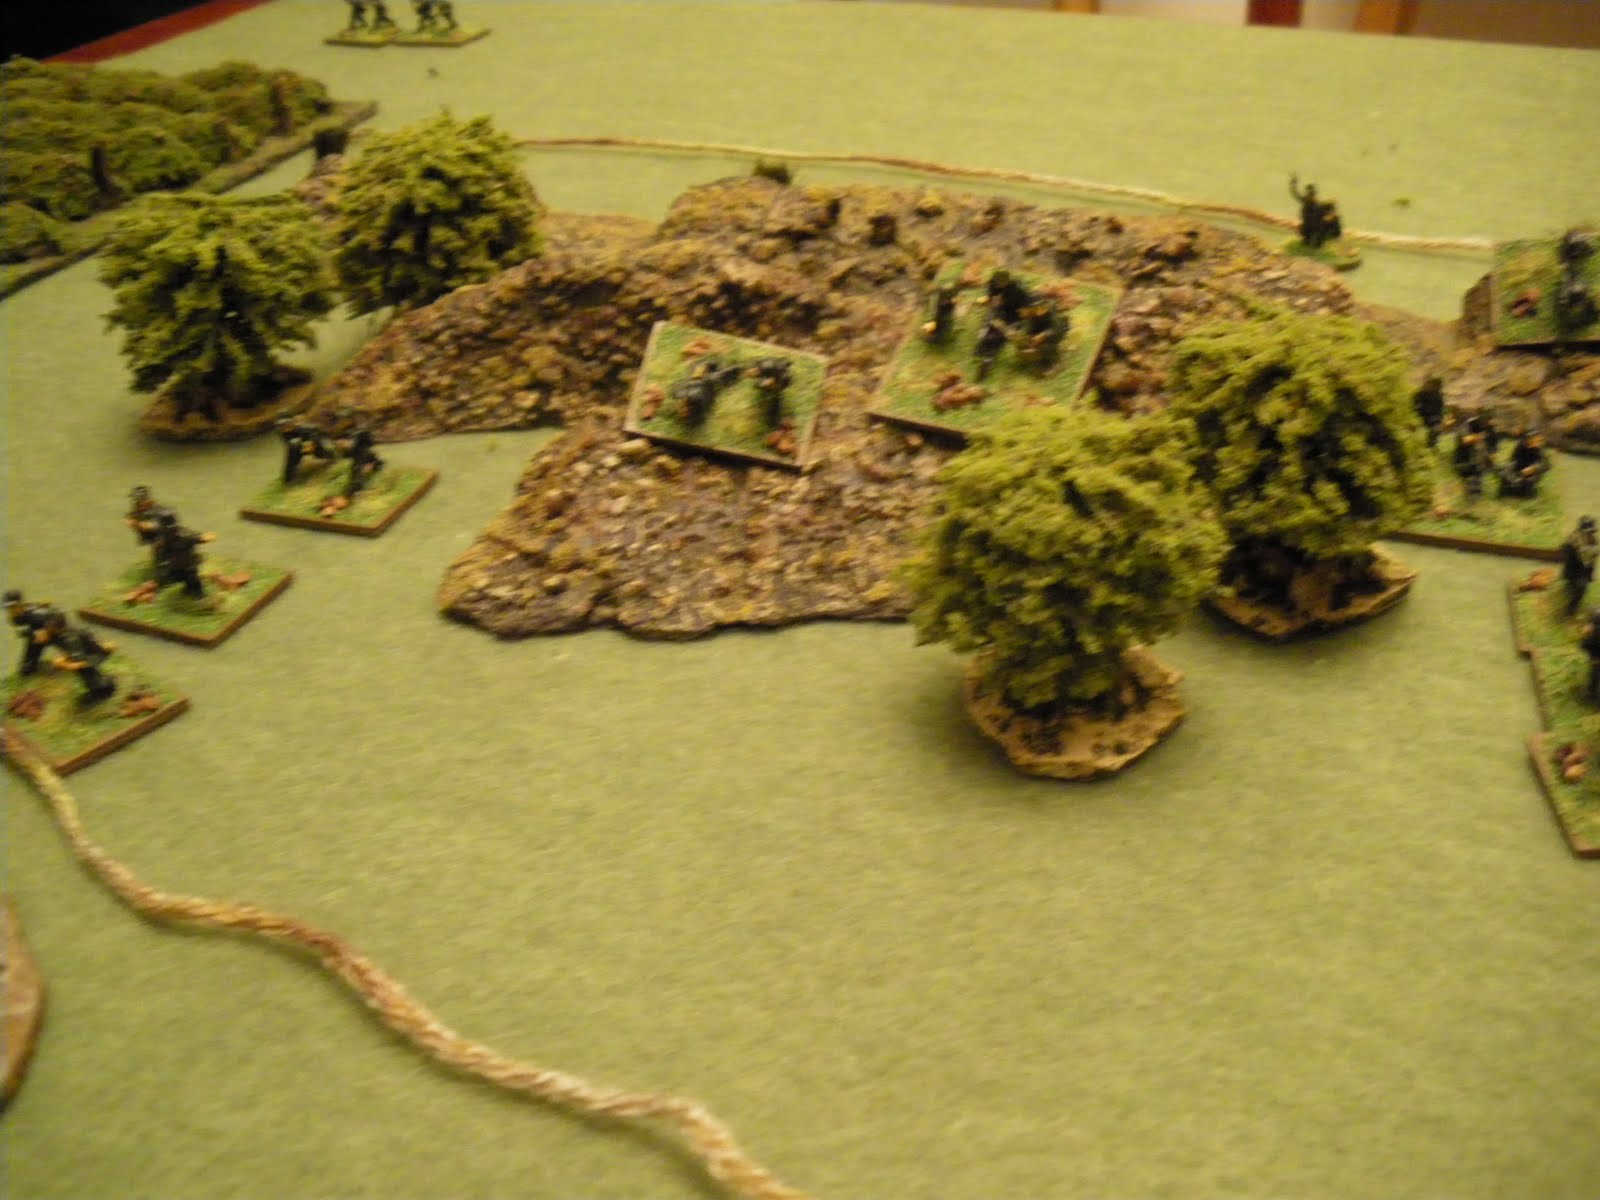
The Germans started and immediately advanced into no-man's land. As the Soviets are concealed the Germans cannot shoot until they reveal the Soviet positions, or the Soviets reveal themselves by opening fire. Which they did to good effect. Most Germans were under half range and were in the open. German sections began dropping like flies or were suppressed. This went on for three turns then Godders diced up a blunder. Which was actually lucky because his visit to the blunder table forced all his units to retreat one full move, safely away from the open ground.

Now in cover, and all Soviet positions revealed, the Germans began the process of concentrating fire and slowly withering down the defenders. Although the Germans took casualties from return fire. But it was the Soviets turn to blunder. My visit to the blunder table was devastating. All my troops advanced one half move towards the enemy. This included my MMG in the bunker and my dug in sections. Now they were all exposed in the open in no-mans land. (The blunder chart represents a loss of command and control of your troops and my lads obviously got all excited at their success to date and went forward after the Germans).
Needless to say, I lost 3 sections and the MMG. I was now down to 1 section, 1 mortar, and my off board mortars.
The Germans advanced up the hill without much effort. The mortar and remaining section were knocked out in close combat. And the game was over. Victory to Godders. And a game well played.
The Butchers Bill. The Soviets were wiped out. Not one step back. The Germans lost 7 Sections and achieved their objective.
Real Historical Outcome. The German 15th Company took the ridge after two hours of fighting at a very high cost in soldiers. It was pre-planned that the 15th Company would then support an attack on the village of Butovo but due to their heavy losses the company was withdrawn from the line. A sign of things to come in the Battle of Kursk.
So as you can see the game played out on the tabletop matched the historical result perfectly. The game would have dragged on if I had not blundered but the result would have been the same. Godders would have stayed in cover and slowly whittled away the defences with HMG, rifle and mortar file. Both of us agreed it was a great scenario to play and using infantry exclusively was challenging and fun. In this scenario one unit of infantry (stand) represent one section. We had to house rule off-board mortars as these are not covered in the rules. And once again Godders supplied me with Belgian beer. Very nice all round.

Monday, December 13, 2010

Hail Caeser Formations


Rick Priestly has posted recommended 28mm formation sizes for his forthcoming Ancient rules titled Hail Caesar.

Single figures are assumed to be based on 20mm x 20mm square bases. Cavalry on 25mm x 50mm bases. Elephants 60mm x 80mm. Light Artillery 40mm x 60mm. Heavy Artillery 60mm x 100mm. 2 Horse Chariots 40mm x 80mm & 4 Horse Chariots 80mm x 80mm.

Formations come in sizes of Standard, Large, Small, and Tiny. Aka Black Powder.

A Standard formation will consist of 16 to 20 models in a two rank formation. So you can have a front rank of 8 models, 9 models or 10 models. It's your choice but it has no effect on the game.
A Large formation will consist of 32 to 40 models in a two rank formation. So a front of 16 to 20 models.

A Small formation will consist of 8 to 12 models in a two rank formation. A frontage of 4 to 6 models.

A Tiny formation will consist of 6 models in a two rank formation. A frontage of 3 models.

Phalanx and Warband are recommended to be in four rank formations with frontages as above with double to amount of figures.

This is only a small summary of the two page document. For a full version you will need to join the Hail Caesar Rules yahoo group.
I got excited and order some more Gripping Beast Romano-British to make an impressive and sizable army.

Thursday, December 9, 2010

Another Game

Myself and Godders had another game of Blitzkrieg Commander. Godders hosted and supplied all the figures and old school terrain. This time we played a convoy ambush. I was the Germans ambushing a British convoy. 1000pts each. It was a good game and I won. The picture above shows a road going through crops in which visibility is reduced to 20cm. It caused all sorts of problems when firing at the enemy and added a new level of tactics to our game. Sorry, I only took one photo.

Wednesday, December 8, 2010

In Memory of Cassie the Beagle

Our Beagle passed away today - aged 8. R.I.P Cassie

Sunday, December 5, 2010

Dismounted Australian Tank Crew

Just in case the lads need to dismount after a freakish Japanese suicide tank attack. Figures are 28mm Black Tree Design. I managed to prep, paint and base these guys in about 4hrs. A personal record.

Star Blazers the Movie

Put your hands up if you got home from school everyday and watched this. Sometime in the late 70's, early 80's I think it was. Well, it's back as a movie. AWESOME. And I found a company that does miniatures.

Some editional information about the plot for those who did not have a TV in their house

"In the distant future, the war between the human race and the Gamilon has taken its toll on the planet Earth. Constant bombardment of radioactive asteroids has rendered the planet's atmosphere uninhabitable. As a means of relief aid, Queen Starsha of the planet Iscandar offers the Earth Forces a device that can completely neutalize the radiation off the planet. For this task, the space battleship Yamato is launched from the remains of its World War II ancestor on a 148,000 light-year journey. However, the crew of the Yamato has only one Earth year to travel to Iscandar and back, or the human race will come to an end".

Thursday, December 2, 2010

Rumble in the Western Desert

On Wednesday night the Afrika Korps commanded by Godders attended my house with victory in North Africa on their mind. A small band of Australian Infantry, a British 17pdr and one Valentine stood in their way. The allies were outnumbered 2 to 1. The game is Blitzkrieg Commander. Scenario 14 is the mission. The Allies must hold the town for 8 turns for victory. The Germans must break the defenders and force them off the battlefield.
The Australians and British hold the small desert town of El Whatitsname somewhere in Western Libya. The town is very famous for it goats. The 8th Army have been on the offensive and now the Germans are counter attacking. Godders chose flank deployment to enter the battlefield. An armoured formation will deploy on the Allies left flank. A small armour formation and an infantry formation will deploy on the right flank.

The Allies have three small formations. A 25pdr Gun and a HMG on the left flank. A Valentine Tank, a 17pdr Anti-Tank Gun, and a section on Australian veteran infantry in the centre. And two 6pdr Anti Tank Guns and a HMG on the right. An Australian Forward Observer is ready to call in support from an off-board artillery battery. The allies have spent resources on defenses in the form of gun pits, barbed wire, one visible minefield and one hidden minefield.

Enter the Germans. Godders passed command rolls on all three formations in turn 1 and they entered the battlefield. Three of his motorcycles carrying HMGs drove straight into the hidden minefield and were destroyed. The HMG crews were left suppressed and stranded in the minefield. The Australians thought this was very funny. One German truck was also destroyed by HMG fire. Godders placed his armour formations into good firing positions by the end of Turn 1.

The dreaded and very strong Afrika Korps armoured formation on the Allies left flank was under the direct command of the Commanding Officer with a CV of 10. Very tough. Turn 2 was a general slugfest between the two armies. The Allies took their first loss with the 17pdr being destroyed. The Germans remained unscratched but the infantry on the right flank were suppressed by artillery fire.

Turn 3 was the turning point of the battle lead by Godders throwing a double 6 for his infantry on the right flank. The resulting visit to the blunder table caused his infantry to advance into close combat with one of the 6pdr guns. Normally a disaster but hand to hand combat favours infantry over a gun crew and the 6pdr was knocked out. Firing between both sides continued with the Germans taking out the Vickers HMG on the left flank. Things were starting to fall apart for the allies.

Turn 4 saw the Germans continue to use their ranged shooting. First the 25pdr Gun was destroyed. Then the Valentine. Then the Australian Infantry section. The Allies fired back with what forces they could muster but to no effect. The allies had lost 5 units and were below Break Point. I had to roll a 9 or below from two D6s for the battlegroup to stay on the table. I rolled two 5's. The allies ran. Tabled in turn 4. Victory to Godders. His honour and prestige returned, a fact confirmed when Rommel invited him over to his tent for a late night coffee!
Once again an enjoyable game. I had great fun with the hidden minefield. If playing this game again I would take more armour. Thanks to Godders for the game. Nothing better than sitting around after the game in the spiritual guidance of "Black Powder" enjoying a beer and talking wargaming. Godders supplied some fancy beer from Belgian called Hoegaarden. At $70.00 a block it as very good. Those Belgians know how to make beer. All figures and terrain are 15mm.

Wednesday, December 1, 2010

Australian 2pdr Anti-Tank Gun


Back to 28mm for a little bit. I have revisited my desert Australians. I have not added any new stuff to this army since 2006. I feel I need some armour and support guns. Inspired by Paul from the Plastic Warriors blog I painted up a QF 2pdr anti-tank gun and crew. The gun is an absolutely superb model from fellow blue brother Crouchie. I hope I have done it justice.
Gun is 28mm from BEF Miniatures and crew are 28mm from Battle Honors. (US Spelling).